 English
 中文
中文 这里吐槽一下测试环境的空间太垃圾,只给数据库分配了4个G的空间,随便导入上百万条数据,轻轻松松就把空间给干满了,真是头疼,今早用Navicat清空数据的时候,报了一个错:1114 – The table ‘xxxx’is full
网上的解决办法大概就是修改/etc/my.cnf配置文件,在在[mysqld]下添加/修改两行:
tmp_table_size = 256M
max_heap_table_size = 256M
其实这个问题还真解决不了我的问题,我的问题就的确是因为空间满了:
可以看出var路径下已经100%,关于如何查看Mysql路径,我们下一篇会有讲解,这篇着重讲解如何搞定这个报错问题。由于是测试环境,所以我们可以删除一些数据来获得空间,但是在生产环境,该方法不适用!!!该篇讲删除数据是否能够释放空间,生产环境,是不能随意删数据的,慎重!!生产一般都有监控,空间达到90%时,基本监控系统会预警,这个时候想的应该是扩容,而不是如何去释放空间的问题!(个人意见)
MySQL删除数据是否释放磁盘空间情况:
1)drop table table_name 立刻释放磁盘空间 ,不管是Innodb和MyISAM(删表结构和数据,谨慎用)
2)truncate table table_name 立刻释放磁盘空间 ,不管是 Innodb和MyISAM 。truncate table其实有点类似于drop table 然后creat,只不过这个CREATE TABLE IF NOT EXISTS IF NOT EXISTS IF NOT EXISTS 的过程做了优化,比如表结构文件之前已经有了等等。所以速度上应该是接近drop table的速度;
3)delete from table_name删除表的全部数据,对于MyISAM 会立刻释放磁盘空间 (应该是做了特别处理,也比较合理),InnoDB 不会释放磁盘空间;
4)对于delete from table_name where xxx带条件的删除, 不管是innodb还是MyISAM都不会释放磁盘空间;
5)delete操作以后使用optimize table table_name 会立刻释放磁盘空间。不管是innodb还是myisam 。所以要想达到释放磁盘空间的目的,delete以后执行optimize table 操作。
6)delete from表以后虽然未释放磁盘空间,但是下次插入数据的时候,仍然可以使用这部分空间。
————————————————
版权声明:本文为CSDN博主「南丘xf」的原创文章,遵循CC 4.0 BY-SA版权协议,转载请附上原文出处链接及本声明。
原文链接:https://blog.csdn.net/weixin_39309402/article/details/103272551
有时候项目好好的就报:数据库操作错误,请联系管理员,发现后台报这个
来说说解决mysql出现"the table is full"的问题:
mysql出现"the table is full"的问题,一般有两个原因:
一 .You are using the MEMORY (HEAP) storage engine; in this case you need to increase the value of the max_heap_table_size system variable. See Section 5.1.3, “Server System Variables”.
ERROR 1114 (HY000) at line 1720: The table 'XXXX' is full
于是就修改Mysql的配置文件my.ini,在[mysqld]下添加/修改两行:
tmp_table_size = 256M
max_heap_table_size = 256M
系统默认是16M,修改完后重启mysql
二.硬盘空间满了,清理硬盘即可.
不要被mysql的安装目录所欺骗, 最好亲自去看看数据存放目录是哪
在my.ini 搜索 datadir
看其指向的目录 就是数据存放目录
我当时的解决方案是,将数据库的磁盘清理了就好了;
我觉得还可以创建临时表,设置表的size
————————————————
版权声明:本文为CSDN博主「小美猪」的原创文章,遵循CC 4.0 BY-SA版权协议,转载请附上原文出处链接及本声明。
原文链接:https://blog.csdn.net/xmz1193184480/article/details/79261623
Symptoms
I want to use XP mode in Windows 7 to connect to other computers on my network. But I cannot find other computers in My Network Neighborhood.
Resolution
1. In the Windows Virtual PC window, click Settings on the Tools menu.
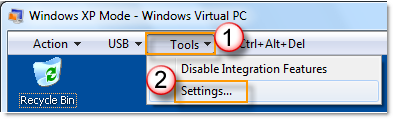
2. Click Networking on the navigation pane, and then select the physical network adapter, and then click OK.

3.Verify that you use the correct workgroup name. In the virtual XP environment, click Start, and then click Control Panel.
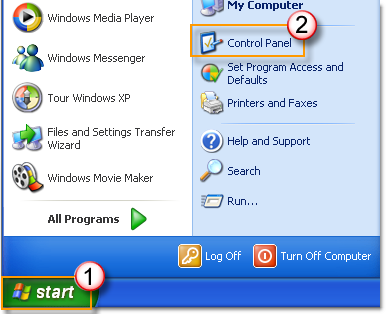
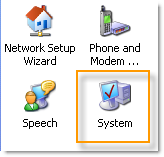
Click System.
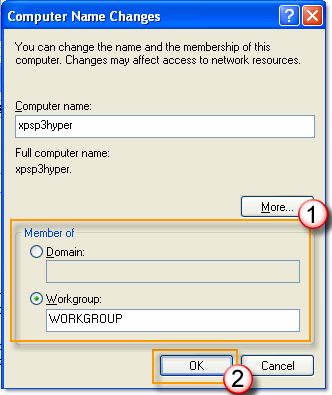
On the Computer Name tab, click Change.
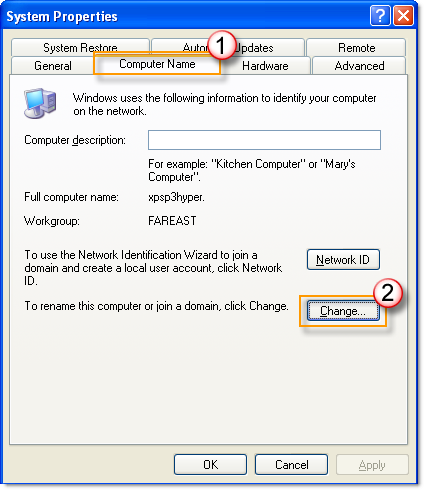
Make sure that the workgroup name is same as the workgroup name for all the computers on your network. If not, change the workgroup name.
4. Next verify that the IP address is in the same network segment. If you are not using DHCP to obtain IP address automatically, please manually set it.
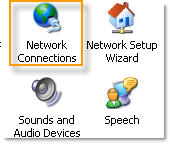
Click Start, and then click Control Panel.
Click Network Connections.
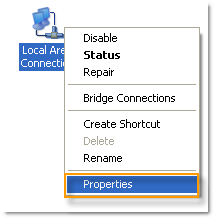
Right-click Local Area Connection, and then click Properties.
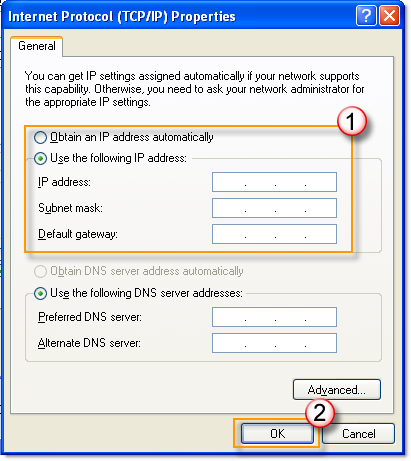
Click Internet Protocol (TCP/IP), and then click Properties.
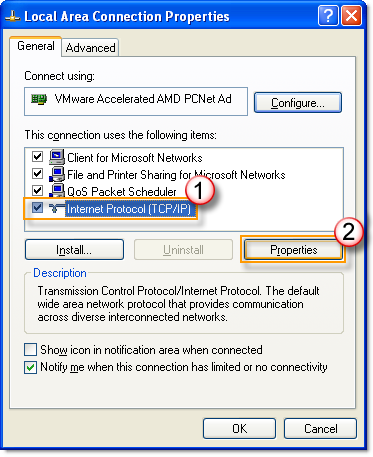
Click Use the Following DNS server Addresses. Manually set the IP address from the same network segment, and then click OK.

|
1. it is recommended that you can use IP sharing and start the DHCP to set network neighbors. |
