USB sharing settings vary according to different models. If the USB settings interface looks different on your router, may refer to
How to access the USB storage device through the Wi-Fi Routers (case 2)?
Insert your USB storage device into the router’s USB port and then access files stored there locally or remotely.
Tips:
• If the USB storage device requires using bundled external power, make sure the external power has been connected.
• If you use a USB hard drive, we recommend its file system is NTFS, FAT32.
• Before you physically disconnect a USB device from the router, safely remove it to avoid data damage: Go to Advanced > USB Settings > Device Settings and click  .
.
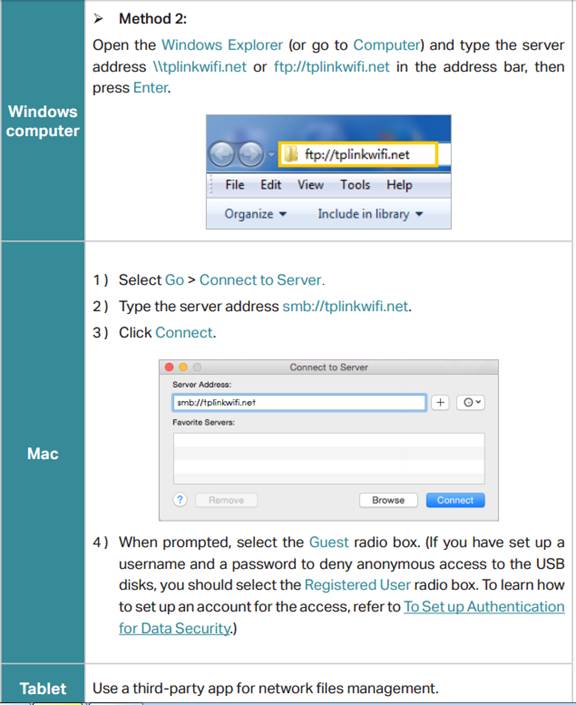
Access the USB Device Locally
Method 1:

Method 2:
Access the USB Device Remotely
You can access your USB disk outside the local area network. For example, you can:
• Share photos and other large files with your friends without logging in to (and paying for) a photo-sharing site or email system.
• Get a safe backup for the materials for a presentation.
• Remove the files on your camera’s memory card from time to time during the journey.
Note: If your ISP assigns a private WAN IP address (such as 192.168.x.x or 10. x.x.x), you cannot use this feature because private addresses are not routed on the Internet.
Follow the steps below to configure remote access settings.
1. Log in to the web-based interface of the router. If you don’t know how to do that, please refer to How do I log into the web-based Utility (Management Page) of the TP-Link wireless router?
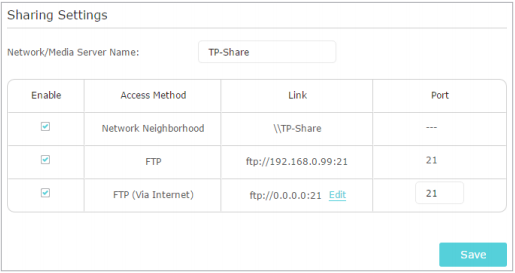
2. Go to Advanced > USB Settings > Sharing Access page.
3. Tick the FTP(via Internet) checkbox, and then click Save.
Note: If you are unable to access via FTP, you may try a different browser since some browsers don't support FTP.
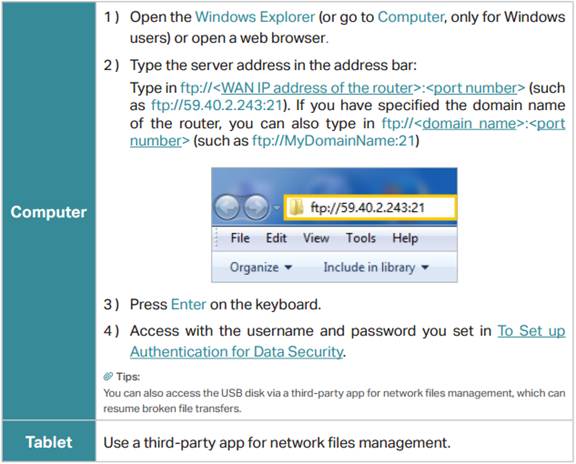
4. Refer to the following table to access your USB disk remotely.
Customize the Access Settings
By default, all the network clients can access all folders on your USB disk. You can customize your sharing settings by setting a sharing account, sharing specific contents and setting a new sharing address on the router’s web management page.
1. Log in to the web-based interface of the router. If you don’t know how to do that, please refer to How do I log into the web-based Utility (Management Page) of TP-Link wireless router?
2. Go to Advanced > USB Settings > Sharing Access page.
- To Customize the Address of the USB Disk
You can customize the server name and use the name to access your USB disk.
1. On the Sharing Settings part, make sure Network Neighborhood is ticked, and enter a Network/Media Server Name as you like, such as MyShare, then click Save.

2. Now you can access the USB disk by visiting \\MyShare (for Windows) or smb:// MyShare (for Mac).
- To Only Share Specific Content
1. Focus on the Folder Sharing section. Click the button to disable Share All, then click Add to add a new sharing folder.
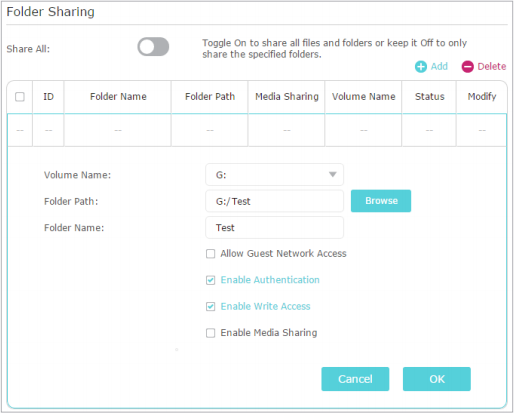
2. Select the Volume Name and Folder Path, then enter a Folder Name as you like.
3. Decide the way you share the folder:
• Enable Authentication: Tick to enable authentication for this folder sharing, and you will be required to log in to the Sharing Account to access the USB disk.
• Enable Write Access: If you tick this checkbox, network clients can modify this folder.
• Enable Media Sharing: Tick to enable media sharing for this folder, and you can view photos, play music and watch movies stored on the USB disk directly from DLNA-supported devices.
4. Click OK.
Tips: The router can share 32 volumes at most. You can click on the page to detach the corresponding volume you do not need to share.
- To Set up Authentication for Data Security
You can set up authentication for your USB device so that network clients will be required to enter username and password when accessing the USB disk.
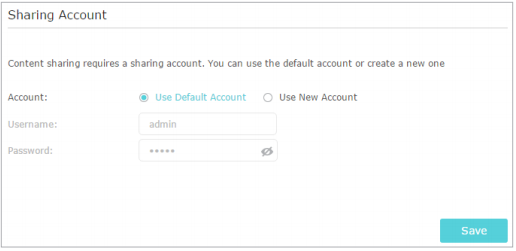
1. On the Sharing Account part, choose Use Default Account or Use New Account. The username and password are both admin for default account. If your choose Use New Account, you have to customize the username and a password.
Note:
For Windows users, do not set the sharing username the same as the Windows username. Otherwise, Windows credential mechanism may cause the following problems:
• If the sharing password is also the same as the Windows password, authentication will not work since the Windows will automatically use its account information for USB access.
• If the sharing password is different from the Windows password, the Windows will be unable to remember your credentials and you will always be required to enter the sharing password for USB access.
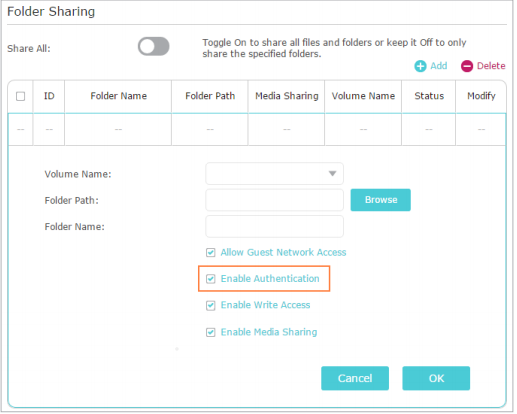
2. Enable Authentication to apply the account you just set.
• If you leave Share All enabled, click the button to enable Authentication for all folders.

• If Share All is disabled, enable Authentication for specific folders.
Note: Due to Windows credential mechanism, you might be unable to access the USB disk after changing Authentication settings. Please log out from the Windows and try to access again. Or you can change the address of the USB disk.
 English
 中文
中文 


 to customize the username, password, and access permission.